I have mentioned before that I love baking my brown rice in the oven. I started baking my brown rice years ago, when following a routine of large batch cooking on the weekends. DH and I were carpooling, and we had an hour commute each way. Leaving our house at 6:30 every morning, and returning at 6:30 PM, did not leave us much time to think about prepping dinner. I loved being able to come home, open the freezer, and grab a bag of perfect, fluffy Oven Baked Brown Rice.
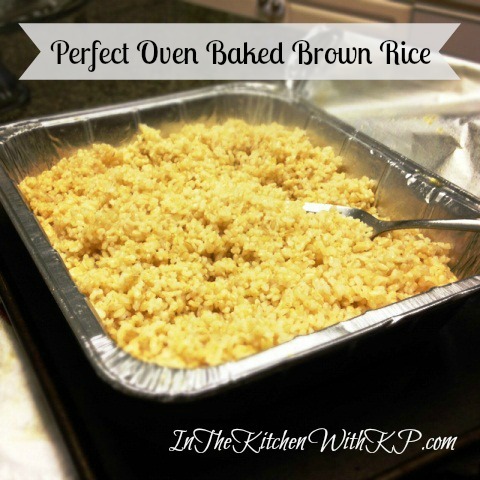
All I had to do was thaw the bag a little, add the rice to a dish, and heat the rest of the way through. So easy! Brown rice typically takes longer to cook than white, and for the evenings where time is short, grabbing a bag of precooked brown rice from the freezer sounds good to me.
Ingredients:
1 1/2 cups short grain brown rice
2 1/2 cups water
1 tablespoon extra virgin olive oil
1 teaspoon kosher salt
2 teaspoons garlic powder (or more if you love garlic like I do)
Directions
1. Preheat the oven to 375 degrees F.
2. Place the olive oil, salt,and garlic powder into an 8-inch square glass baking dish. (I doubled the recipe this week, so I used a bigger, disposable pan for convenience.)
3. Bring the water to a boil in a kettle or covered saucepan (I microwave the water)
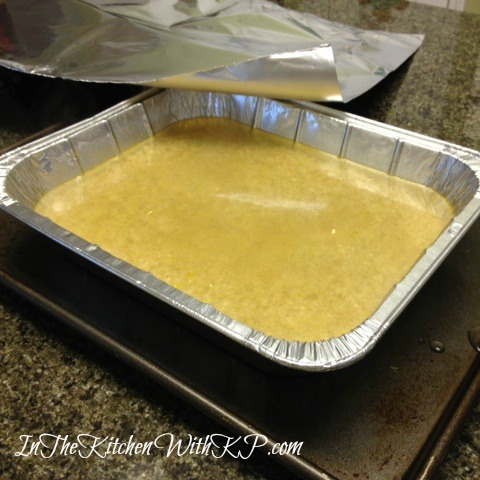
4. Once the water boils, pour it carefully into the baking dish over the oil, salt, and garlic powder. Stir to combine.
5. Add rice to baking dish, stir to combine again.
6. Cover the dish tightly with heavy-duty aluminum foil.
7. Bake on the middle rack of the oven for 1 hour.
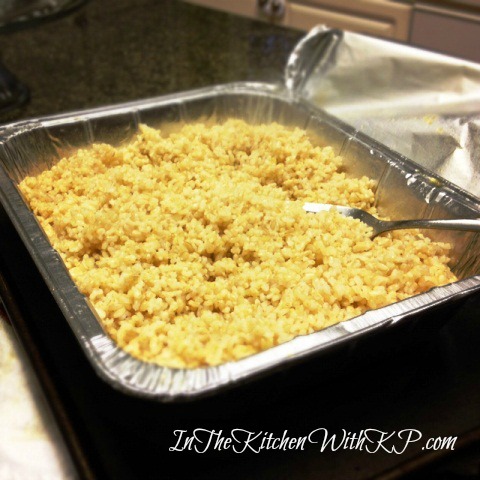
8. After 1 hour, remove cover and fluff the rice with a fork. Serve immediately.
You can find the original recipe I started with from Alton Brown here. Like I said above, I usually make double batches of this rice on the weekend. For these photos, I doubled the ingredients listed, and used a disposable 9X13″ pan. The cooking time is still one hour for a double batch of the rice. Once the rice is cooled, you can separate the portions into freezer storage bags, flatten, and freeze for later use.
I have also tried other flavors of rice and they always turn out fluffy every time too. Instead of the garlic powder, try adding a packet of taco seasoning or Italian seasoning before baking, for a little variety. You can mix it up to your family’s favorite flavor profile with ease. Once you start baking brown rice, I am pretty sure you won’t go back to making it any other way.
How do you make your rice?
- 1½ cups short grain brown rice
- 2½ cups water
- 1 tablespoon good flavored extra virgin olive oil
- 1 teaspoon kosher salt
- 2 teaspoons garlic powder (or more if you love garlic like I do)
- Preheat the oven to 375 degrees F.
- Place the olive oil, salt,and garlic powder into an 8X8" square glass baking dish. (I doubled the recipe this week, so I used a bigger, disposable pan for convenience.)
- Bring the water to a boil in a kettle or covered saucepan (I microwave the water)
- Once the water boils, pour it carefully into the baking dish over the oil, salt, and garlic powder. Stir to combine.
- Add rice to baking dish, stir to combine again.
- Cover the dish tightly with heavy-duty aluminum foil.
- Bake on the middle rack of the oven for 1 hour.
- After 1 hour, remove cover and fluff the rice with a fork. Serve immediately.

I eat brown rice all the time, and I like this idea, a lot!
I love this idea! I’ve done this with with other foods you would normally make on the stove.
I’ve also done this with whole wheat couscous and made my own freezer meals. Works great!
This looks wonderful. I have never tried baking my rice!
Give it a try! You’ll never go back to stove top again! 🙂
Twitter: DebBat
Thanks for sharing this recipe. It looks easy enough and sometimes seems like it takes forever to get done. I have bookmarked this page for future reference. If you get a chance stop by my blog Recipe for Life at :
http://deborah-bateman.blogspot.com and check out some of my family favorite recipes.
Blessings,
Deborah H. Bateman-Author
What a great idea! And I love that it freezes well too!
It is such a time and money saver to pack and freeze vs buying it pre-made for those rushed evenings!
I eat rice ever so often, this is one good alternative.. in case my trusty rice cooker decides to die on me. Also, rice cooker is the best investment ever 🙂
I have a rice cooker too, and tried it out a few weeks ago for the first time. Sadly mine is too small for the way my husband eats. 🙂 I’d need an industrial sized cooker! haha!
I need to try this! I don’t really eat brown rice much, but probably need to start. Having it ready to go in the freezer, just sounds so convenient.
The key for me really enjoying it, is adding the seasoning and using short grain. Totally changes your perception of brown rice.
I typically cook a large amount of brown rice at a time as well just because it is so easy for my family to have it ready. Something that you can also use that I have discovered is to use a little more water, at 3 1/2 cups and 2 cups of brown rice. Instead of adding salt or garlic or anything else use the new Knorr Homestyle Stocks. It gives it a great taste and you can use either the beef or chicken concentrated stock to compliment your meal. When you freeze it just label appropriately on your freezer bag! I will definitely try cooking it in the oven because this sounds even easier than my method, thanks for the idea!
I’ve tried stock and it works well. I just love the garlic and good olive oil combo. So glad you are going to try it!
[…] that were truly a delight to eat, and in turn trick myself into not missing all the carbs (like yummy brown rice), that I was trying to […]
[…] to come up with an acceptable starch to keep me on plan. I am huge fan of brown rice, and I bake my brown rice in the oven in large batches on the weekend. I had some in the freezer, so I threw caution to the […]
What size pan did you use?????????????
Please advise, thanks
Hi Vera, the recipe listed calls for an 8×8 square glass baking dish. Thanks for catching the error not listing the size. In the photos, I doubled the recipe amounts, and I am guessing the disposable pan is a 9×13. I bought it at my local dollar store. I keep multiples on hand for taking casseroles to pot lucks, etc.
I made this tonight using long grain brown rice, because that is all I had on hand. It was so easy and yummy! I think I may add more garlic powder the next time because, more garlic is just better. 🙂
It was the most perfect brown rice I’ve ever made and I can’t see my going back to the stove top method!
Thanks for this wonderful recipe!
Glad you liked it, Wendy! I ave used long grain as well in a pinch. I just prefer the texture of the short grain. 🙂 Thanks so much for sharing your feedback! It made my day!
[…] decided to make the switch to the healthier grain after learning how to bake my brown rice in the oven. DH inherited high cholesterol from his side of the family, and even though it’s […]
Thank you for this rice recipe – great.
It’s great to make extra a freeze for easy grab and reheat! Let me know when you make it!
I swapped chic stock for the water and added 1/2 cup tomato sauce. Added cumin and made into spanish rice. Added a little cheddar cheese when serving. Turned out great.
Love your creativity, and it sounds delicious. Thank you for sharing and I am glad you liked the recipe.
[…] me, my grandmother used to bake rice all the time! I googled baking brown rice which lead me to How to Make Perfect Baked Brown Rice at In the Kitchen with KP; easy to follow directions and an hour later I was serving up Perfect […]
[…] Oven baked rice […]
Best way to make brown rice in oven, very well explained by the writer, thanks for sharing such healthy recipes.
Do I need to soak the rice befor i do it and could I use chicken broth?
There is no need to pre-soak the rice before adding the hot water and covering. If you prefer to rinse it slightly, that is fine. And, yes you can definitely use chicken broth. If you do, you may want to eliminate the salt in the recipe, and maybe the olive oil too, depending on your taste preference.